Previous part: Putting your web application online – Part 6 – Advanced anti-bot protection

| Starting point: | You have a Linux server accessible through a domain name |
| This part result: | Your application is able to send trusted email |
| Skill level: | Junior |
| Time: | About 15 minutes |
Steps to take:
Node++ provides npp_email function that simplifies sending email directly from the application code. USERS module uses it for example to send registration confirmations or password reset links:
npp_email() uses sendmail command.
Technically sending email from a Linux server is trivial. We just need an MTA (Message Transfer Agent) to be running. The whole challenge is about being trusted, that is to ensure that our messages do not end up in spam folders or even worse – being outright rejected by the recipients' mail servers.
Once you gain this trust, it becomes part of your critical assets. That includes the IP address and your domain name. If anything happens to them, like a substancial amount of unwanted email coming from your address, your IP and domain may end up being blacklisted. That's why Amazon is extremely careful with enabling messaging from their servers, and frankly, so should you.
Step 1 – Install and enable sendmail
The two most popular MTAs are Sendmail and Postfix. Many systems are shipped with either of them already installed. Both can be used with sendmail command.
The first step would be to ensure we have an MTA running:
Most likely, we have one of the three results:
Result 1: message sent
Bingo! Go to Step 2.
Result 2: no sendmail
Install sendmail:
And try sending the test message again.
Result 3: sendmail installed but failed to send
On the newest Amazon Linux 2023 sendmail by default runs only on the run level 4. This is not the normal system operation state, which for the server machine is typically level 3.
Let's add other run levels to sendmail:
Now try sending the test message again.
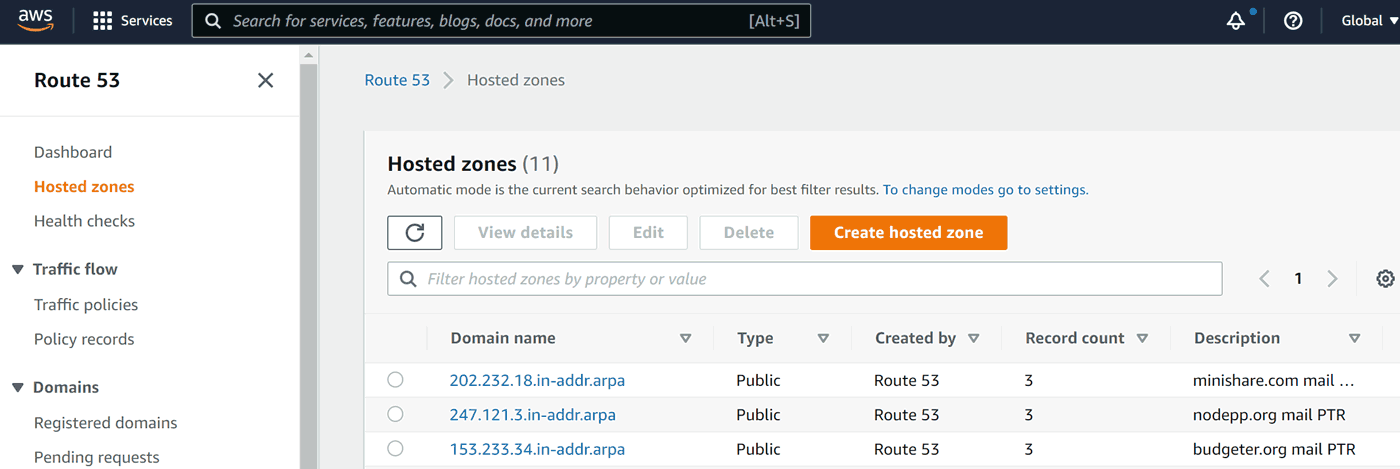
Step 2 – DNS records
We need to add two types of DNS records. Let's navigate to AWS Console and Route 53, then Hosted Zones:
MX
Technically MX record serves the incoming mail. But some mail servers use MX lookup as part of their spam checklist and don't trust messages from MX-less domains.
Setting up an MX record is as simple as adding a priority (typically 10), space and our domain name:
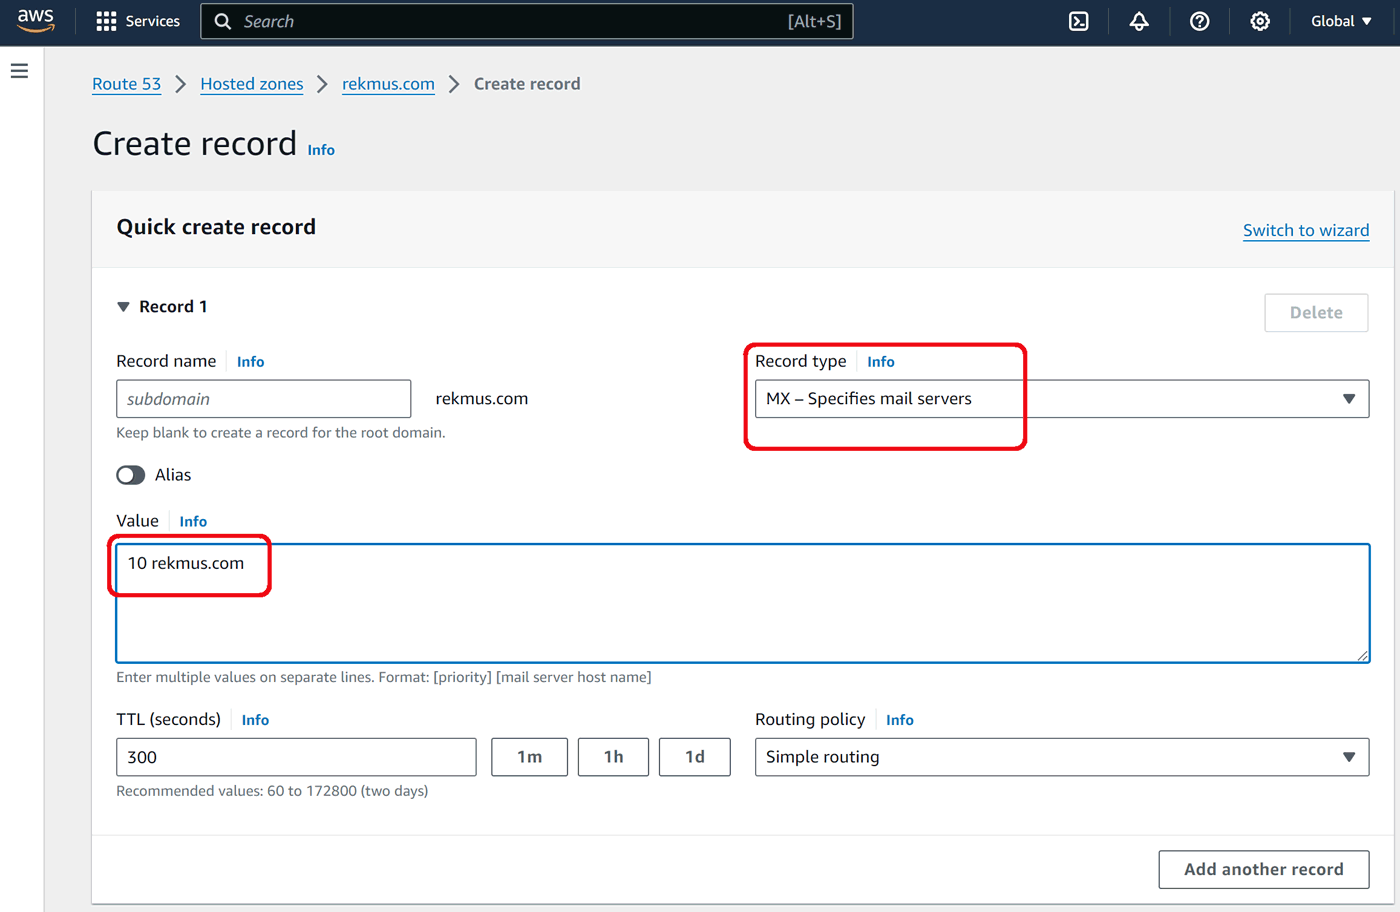
Click Create records.
TXT SPF
SPF stands for Sender Policy Framework and lists all the servers authorized to send email from a domain. Put your server IP address as shown below:

Click Create records.
TXT DMARC
DMARC stands for Domain-based Message Authentication, Reporting and Conformance policy and defines what the recipient's mail server should do in case it receives messages that fail authentication checks. There's a good explanation on Google Workspace Admin Help.
Besides the policy, we should specify email address which will be receiving DMARC reports from email servers that get email from our domain.
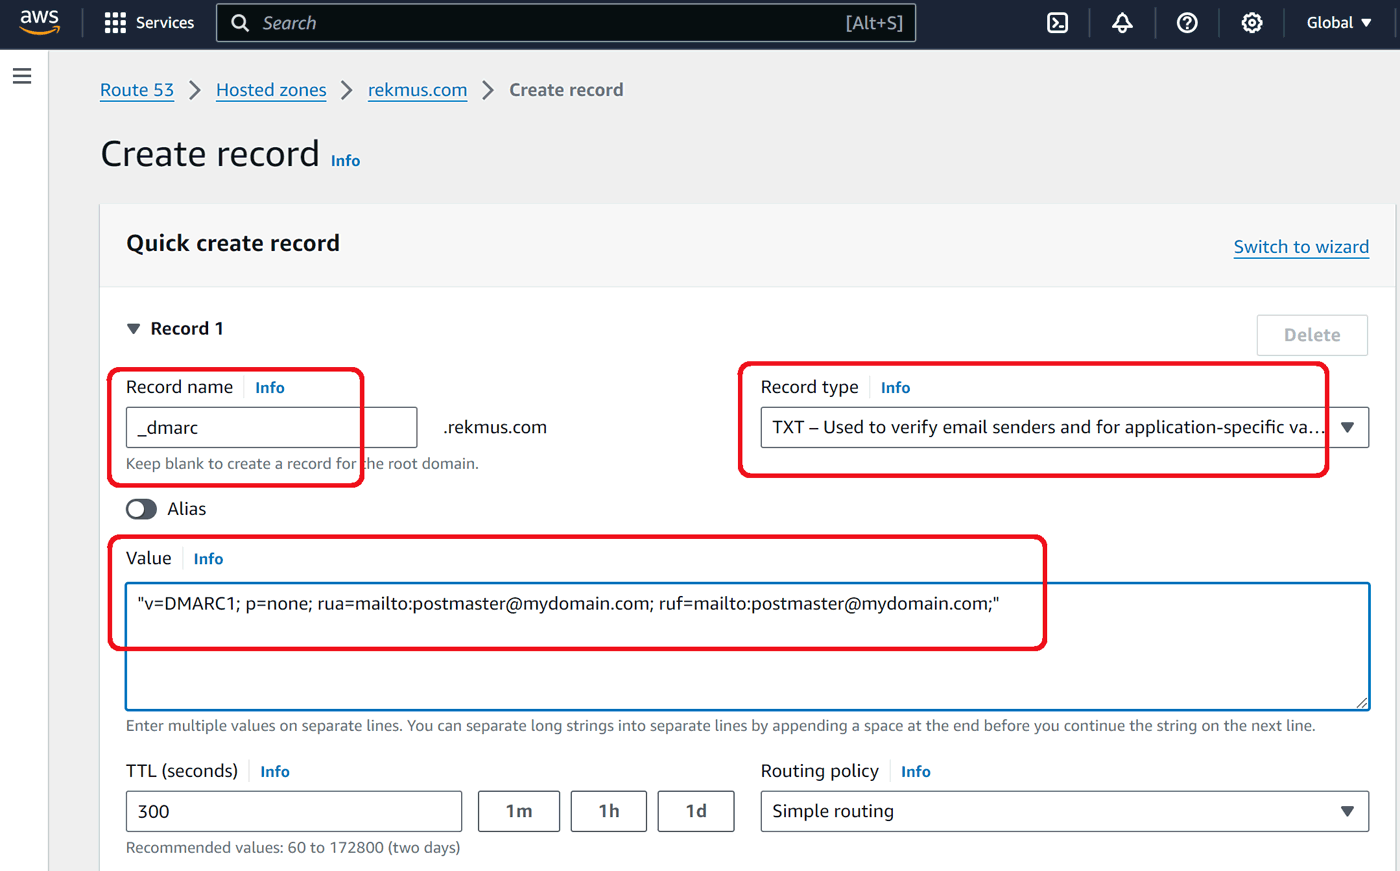
Click Create records.
Step 3 – Reverse DNS
Reverse DNS (PTR record) allows receiving mail server to check whether origin IP address matches the domain's address resolved through rDNS lookup.
To set this record up on AWS, we need to navigate to EC2, Elastic IPs, choose the address and click Actions:
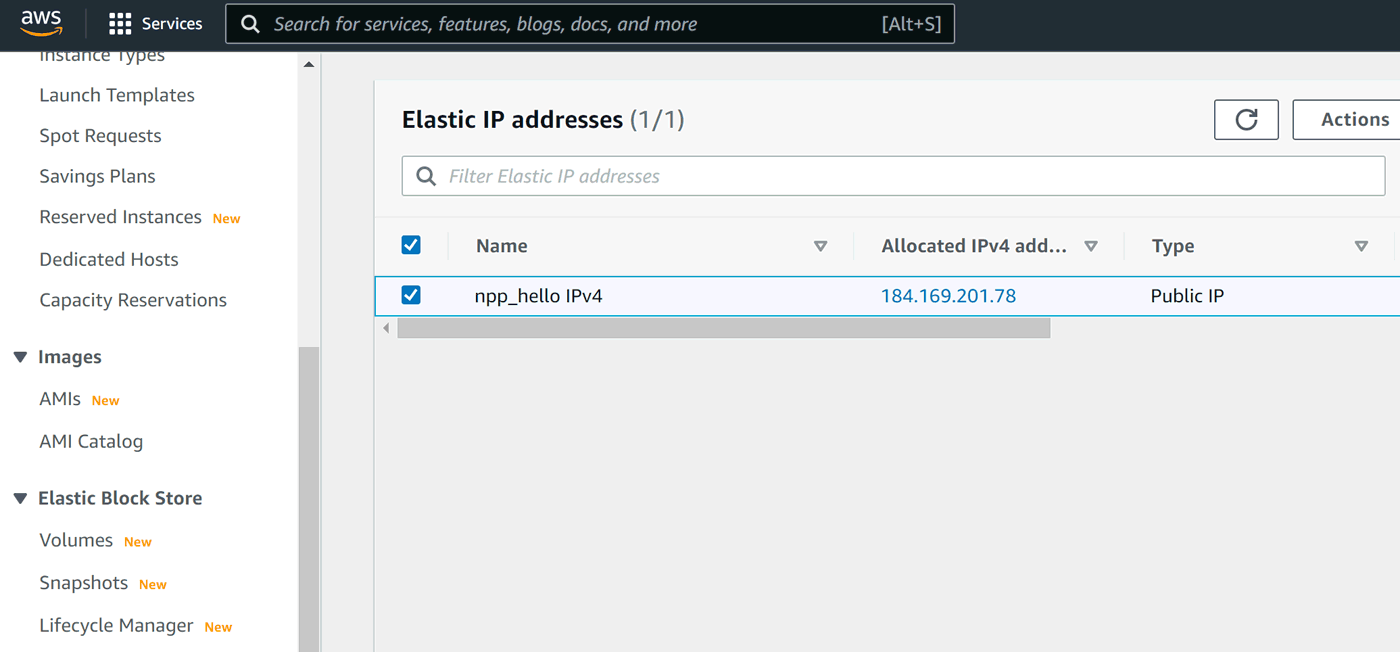
Choose Update reverse DNS and enter your domain name:
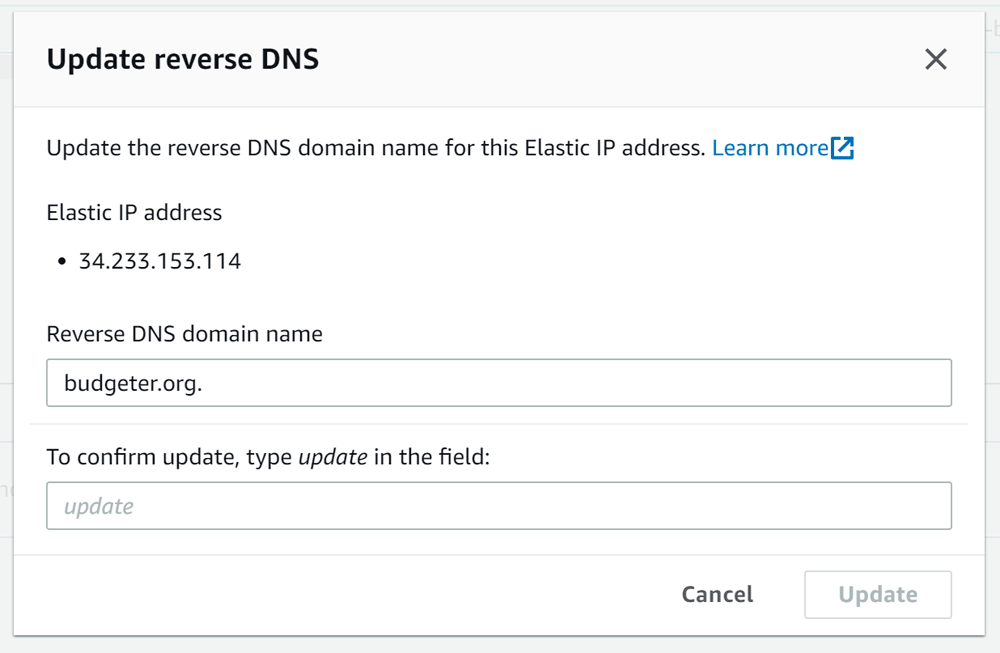
Confirm you want to update in the next field and click Update.
Step 4 – Lifting AWS restrictions
As I mentioned at the beginning, Amazon is very careful about sending email from their IPs. Following this philosophy, by default sending messages is restricted to literally couple of them. When we are ready, we can ask them to lift this restriction.
Here is the magic place you can request this:
Request to remove email sending limitations
We need to be specific about the use case, i.e. sending confirmation links during registration. We also need to provide a statement that our application is secured against abuse leading to spam. Usually within a couple of hours we should receive a response from the support team.
That's it for now! Our application is able to send trusted email.
Mailbox image courtesy of Grooveland Designs.
Is something wrong here? Please, let us know! 